Record, Organise and Refine Components
Estimated time to read: 4 minutes
Class Responsibility Collaborator (CRC)
Identify Components, Connections and Responsibilities from some requirements when forming the conceptual design.
This is where you give your initial thoughts on how you might satisfy the requirements. In the technical design, you learned how these components and connections are further refined to give them technical details. This makes them easier to implement.
CRC Cards
Similar to how note cards help you organise your talking points, CRC cards help you to organise your components into classes, identify the responsibilities and determine how they will collaborate with each other.
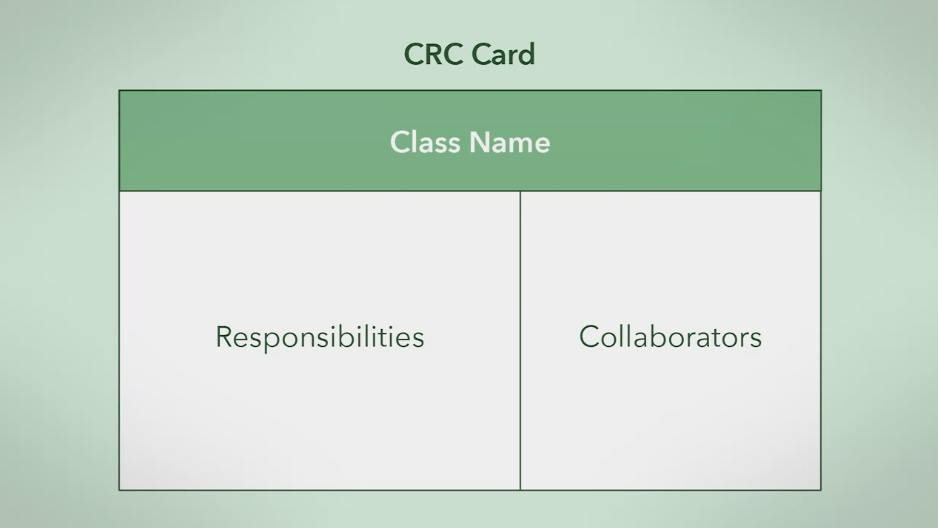
Example CRC card
- The top of the card has the class name.
- On the left are the responsibilities of the class
- On the right, you list collaborators (Collaborators are other classes that the class interacts with to fulfil its responsibilities.)
To keep track of each candidate component and its responsibilities using a CRC card, you place a component's name in the class name section and the responsibilities in the responsibilities section.
In the collaborators section, you list other components that your current component connects to or interacts with to fulfil its responsibilities.
Note CRC cards are small on purpose, so you can't write much on them. This forces you to keep breaking down each component into smaller components and eventually, classes that are small enough to be individually described on index cards.
Scenario
Eliciting Requirements
Consider a bank machine, for instance.
- You insert your bank card into the bank machine
- The bank machine will then ask you to enter a PIN authenticating you for access.
- After that, you can choose to deposit, withdraw or check your balances.
This scenario suggests the basic requirements for the system. Admittedly, it is an incomplete set of requirements but it's a good start. Remember that requirements are often incomplete and are resolved with further interactions with your client and end users.
Conceptual Design
The next step is to design the bank machine. But as we form the conceptual design beyond just identifying components, their responsibilities and connections, we are going to represent them with our new technique, the CRC card.
Much like how note cards are used to organise talking points, CRC cards are used to record, organise and refine the components in your design.
Scenario: Bank Customer
 We place bank customer in the class name section. The bank customer's responsibilities are insert a bank card or choose an operation, such as deposit, withdraw or check account balance. Let's list these in the responsibility section of the CRC card.
All of these bank customer responsibilities involve a bank machine.
The customer can insert bank card in the machine and choose an operation. Since the bank machine is required for our bank customer component to fulfil its task, we placed bank machine under the collaborators section of the bank customer card.
Scenario: Bank Machine
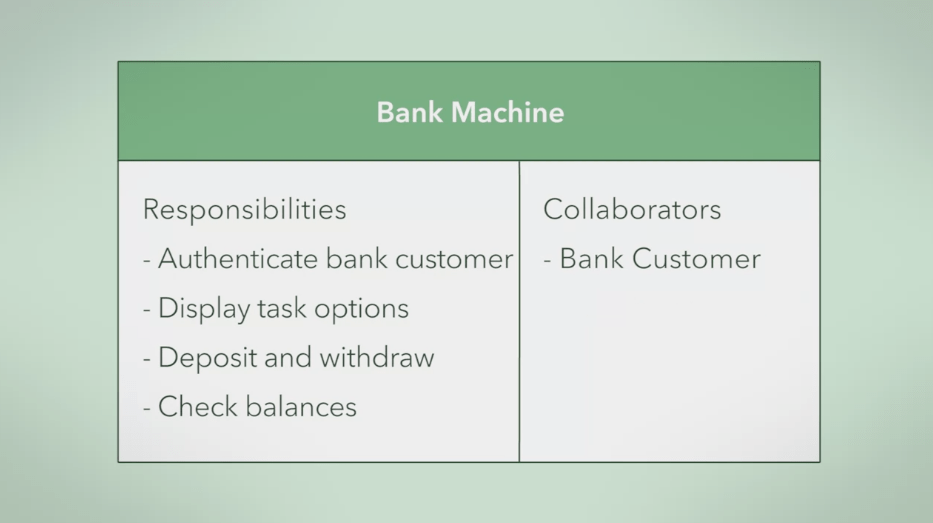
The machine's responsibilities include authenticate bank customer, display task options, deposit, withdraw and check balances. And since this card interacts with the bank customer component, add bank customer to the collaborators section of the bank machine card.
Scenario: Organising Cards
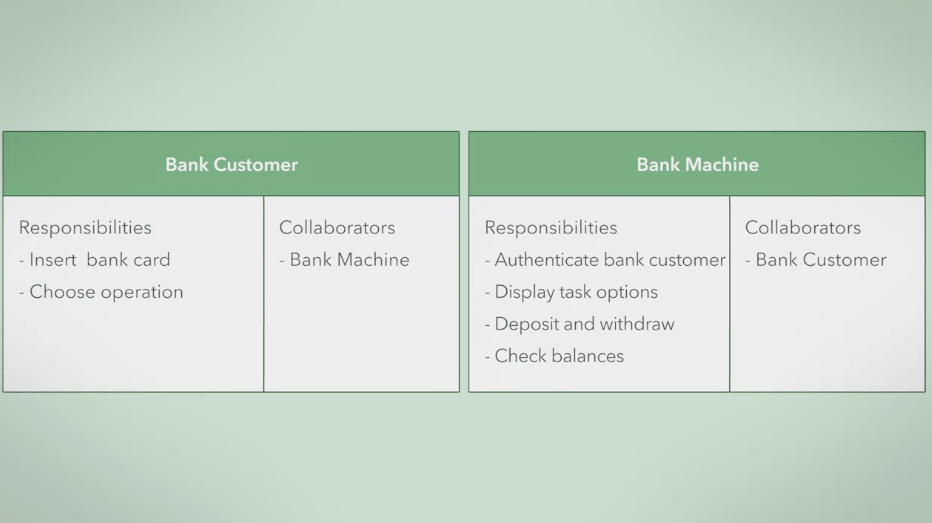 You can move related cards together or situate cards to suggest relationships. With our CRC cards, we can organise things by placing collaborating components together.
For example, put the bank customer CRC card on the left and the bank machine CRC card on the right. With the CRC cards organised, you can simulate a prototype design of the system so far.
Scenario: Authorisation
Consider the scenario of the bank machine authenticating our bank customer. You can imagine enacting our bank customer's insert card responsibility. This in turn, collaborates with the bank machine and triggers its responsibility to authenticate the bank customer. Once authenticated, the bank machine enacts its responsibility to display the task options. Here is where CRC cards shine. They are cheap, editable and disposable, so you are encouraged to experiment and play with alternative designs.
Scenario: The Bank
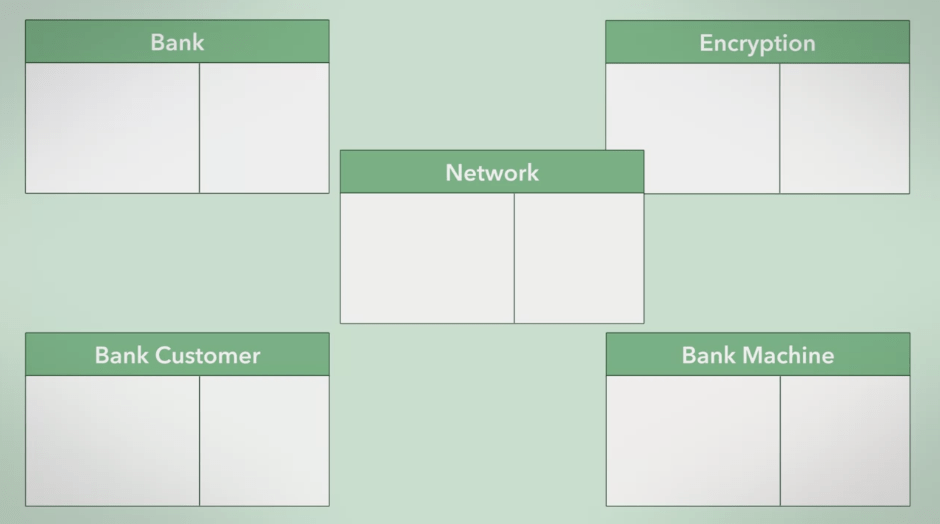
In the simulation we just did, you might ask, how does a bank machine authenticate the bank customer? This question suggests adding another component, the bank, where the bank machine communicates to authenticate the bank customer.
Now, you should understand how working with CRC cards can help to identify needed components in the design. You can find more candidate components by using CRC cards to prototype and simulate various scenarios.
For instance, since the bank machine will talk over a network to the bank, you can add a network CRC card between them.
You want the network communication to be secure, so you make the network collaborate with a new component called encryption. This component supports secure communication with the bank.
As well, you probably notice the bank machine itself contains several different components, which seem small enough to be individual classes for programming. For example, there's a card reader, keypad, display, cheque slot and cash dispenser. Each of these classes but their responsibilities and collaborators can be described on their own cards.
In a design meeting with the software development team, you can have all the cards on the table and discuss a simulation of how these classes work with other classes to achieve their responsibilities.
As before, these simulations may reveal shortcomings in the design and you can experiment with alternatives by introducing appropriate cards.